
first of all, thank you all so much for your support
about our decision to send sydney to public school.
a feeling of community is one of
my favorite things about blogging,
so i read and appreciate each comment.
***
i hadn't done any black and white photos
for awhile, or anything other than snap shots,
so i decided to take a few of my middle two
this afternoon.
in order to get the best light, i opened my front door
and sat jaxon against a white door.
i had a white blanket in his lap
to try and reflect some light up into his face,
but it didn't work as well as a reflector would have.
when taking pictures, it's best for the photographer
to wear a white shirt, too.
it prevents color casts on your subject's face
if you're shooting up close,
and also acts as a natural reflector.
when taking pictures, it's best for the photographer
to wear a white shirt, too.
it prevents color casts on your subject's face
if you're shooting up close,
and also acts as a natural reflector.
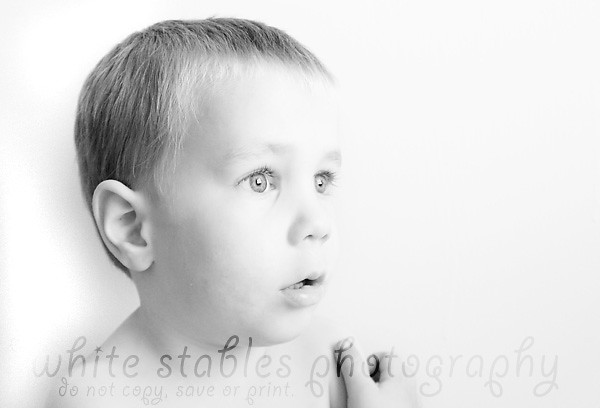
my settings for this were
iso 400
f-stop (aperture): 3.2
shutter speed: 1/40, which is really, really low.
luckily, i have steady enough hands that i could
make it work.
i didn't want to raise my iso any higher( = grainy photos),
so once jax was done with me, (60 seconds!)
i decided to try the mudroom to see if i
could get better light from the sliding glass door.
ali was a much more cooperative subject,
and the lighting was a lot better, too.
these are my favorites...maybe i'll show
some fun out takes later.
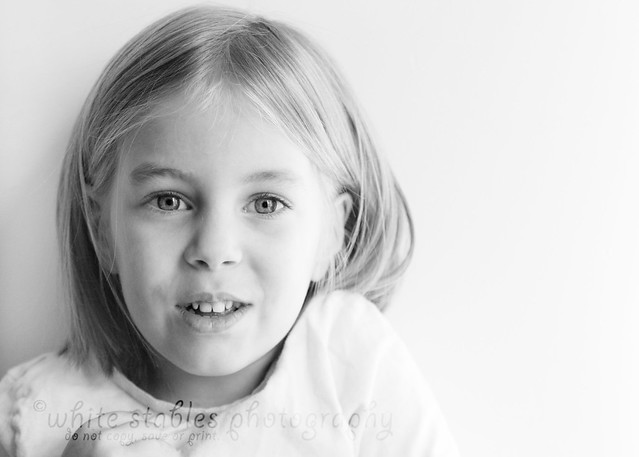

my settings for these were:
iso: 400
f/3.2
ss: 1/250...see? much better!
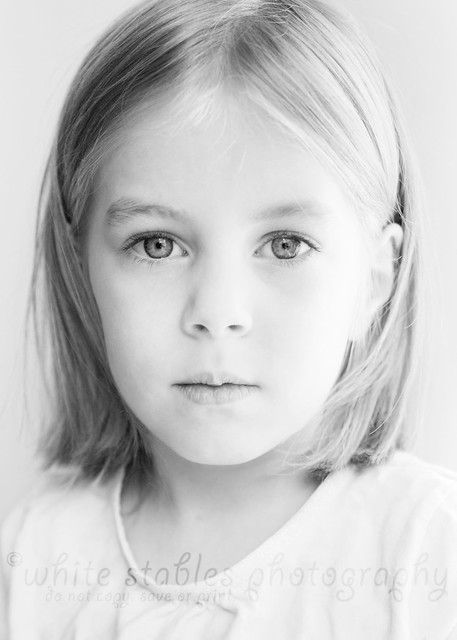
photoshop users:
as far as processing goes,
i used curves to bring up the midtones,
used layer masks to even out the lighting,
dodged the shadows and her eyes at 5%,
and used the gradient map to convert to black and white.
for the love of black and white photography,
please don't use the "convert to black and white" in photoshop.
the result is so muddy.
the gradient map will give you a much cleaner
black and white, and you can use curves
and/or bump the contrast to enhance it.
if you don't use the full version of photoshop,
i think elements has "levels", and that's similar to curves.
finally, after i am done, i resize
and then run the "unsharp mask"
to sharpen:
amount: 95-100%
radius: 0.6%
threshold: 4-5
you can play with those settings,
but it will give you a nice overall
sharpen without overdoing it.
oh yeah, i had to clone snot from
jaxon's nose, too.
gotta keep it real, yeah?!
i love sharing the pictures, but i hope
including that information helps some
of you who are learning manual.
feel free to ask questions...
as you know, i'm passionate about photography,
and willing to share what knowledge i have.
thanks so much for reading.
5 comments:
Ali looks so grown up all of a sudden, especially in these photos, awww <3
so cute! They look great!
Laura
www.happyroost.blogspot.com
Thank you for all the technical details! I'm getting a DSLR for my birthday and know nothing :) But I want to learn!
these are stunning..as always! I love that you shared your setting and pp. You are seriously an inspiration to me and I love your photography! I hope I am improving and will be at your level one day! Oh and Jax and Ali are so stinkin cute!!!
Thanks for the tip about gradiant map for B&W. I had heard of doing that, but I always did Channel Mixer -> Monochrome 60-20-20. I just did a side-by-side and gradiant map looks much better. (The only time I use "convert to black and white" is if I am mad at someone, I am passive-agressive like that).
Post a Comment
i love hearing from you! thanks for commenting!